Last week, I wrote about our prenup shoot at Casa San Pablo. I mentioned in the credits that we managed to pull off the shoot with DIY make-up and styling. For those who are considering the DIY path for their prenup shoot, allow me to share with you how I managed to look decent in the pictures (haha!).
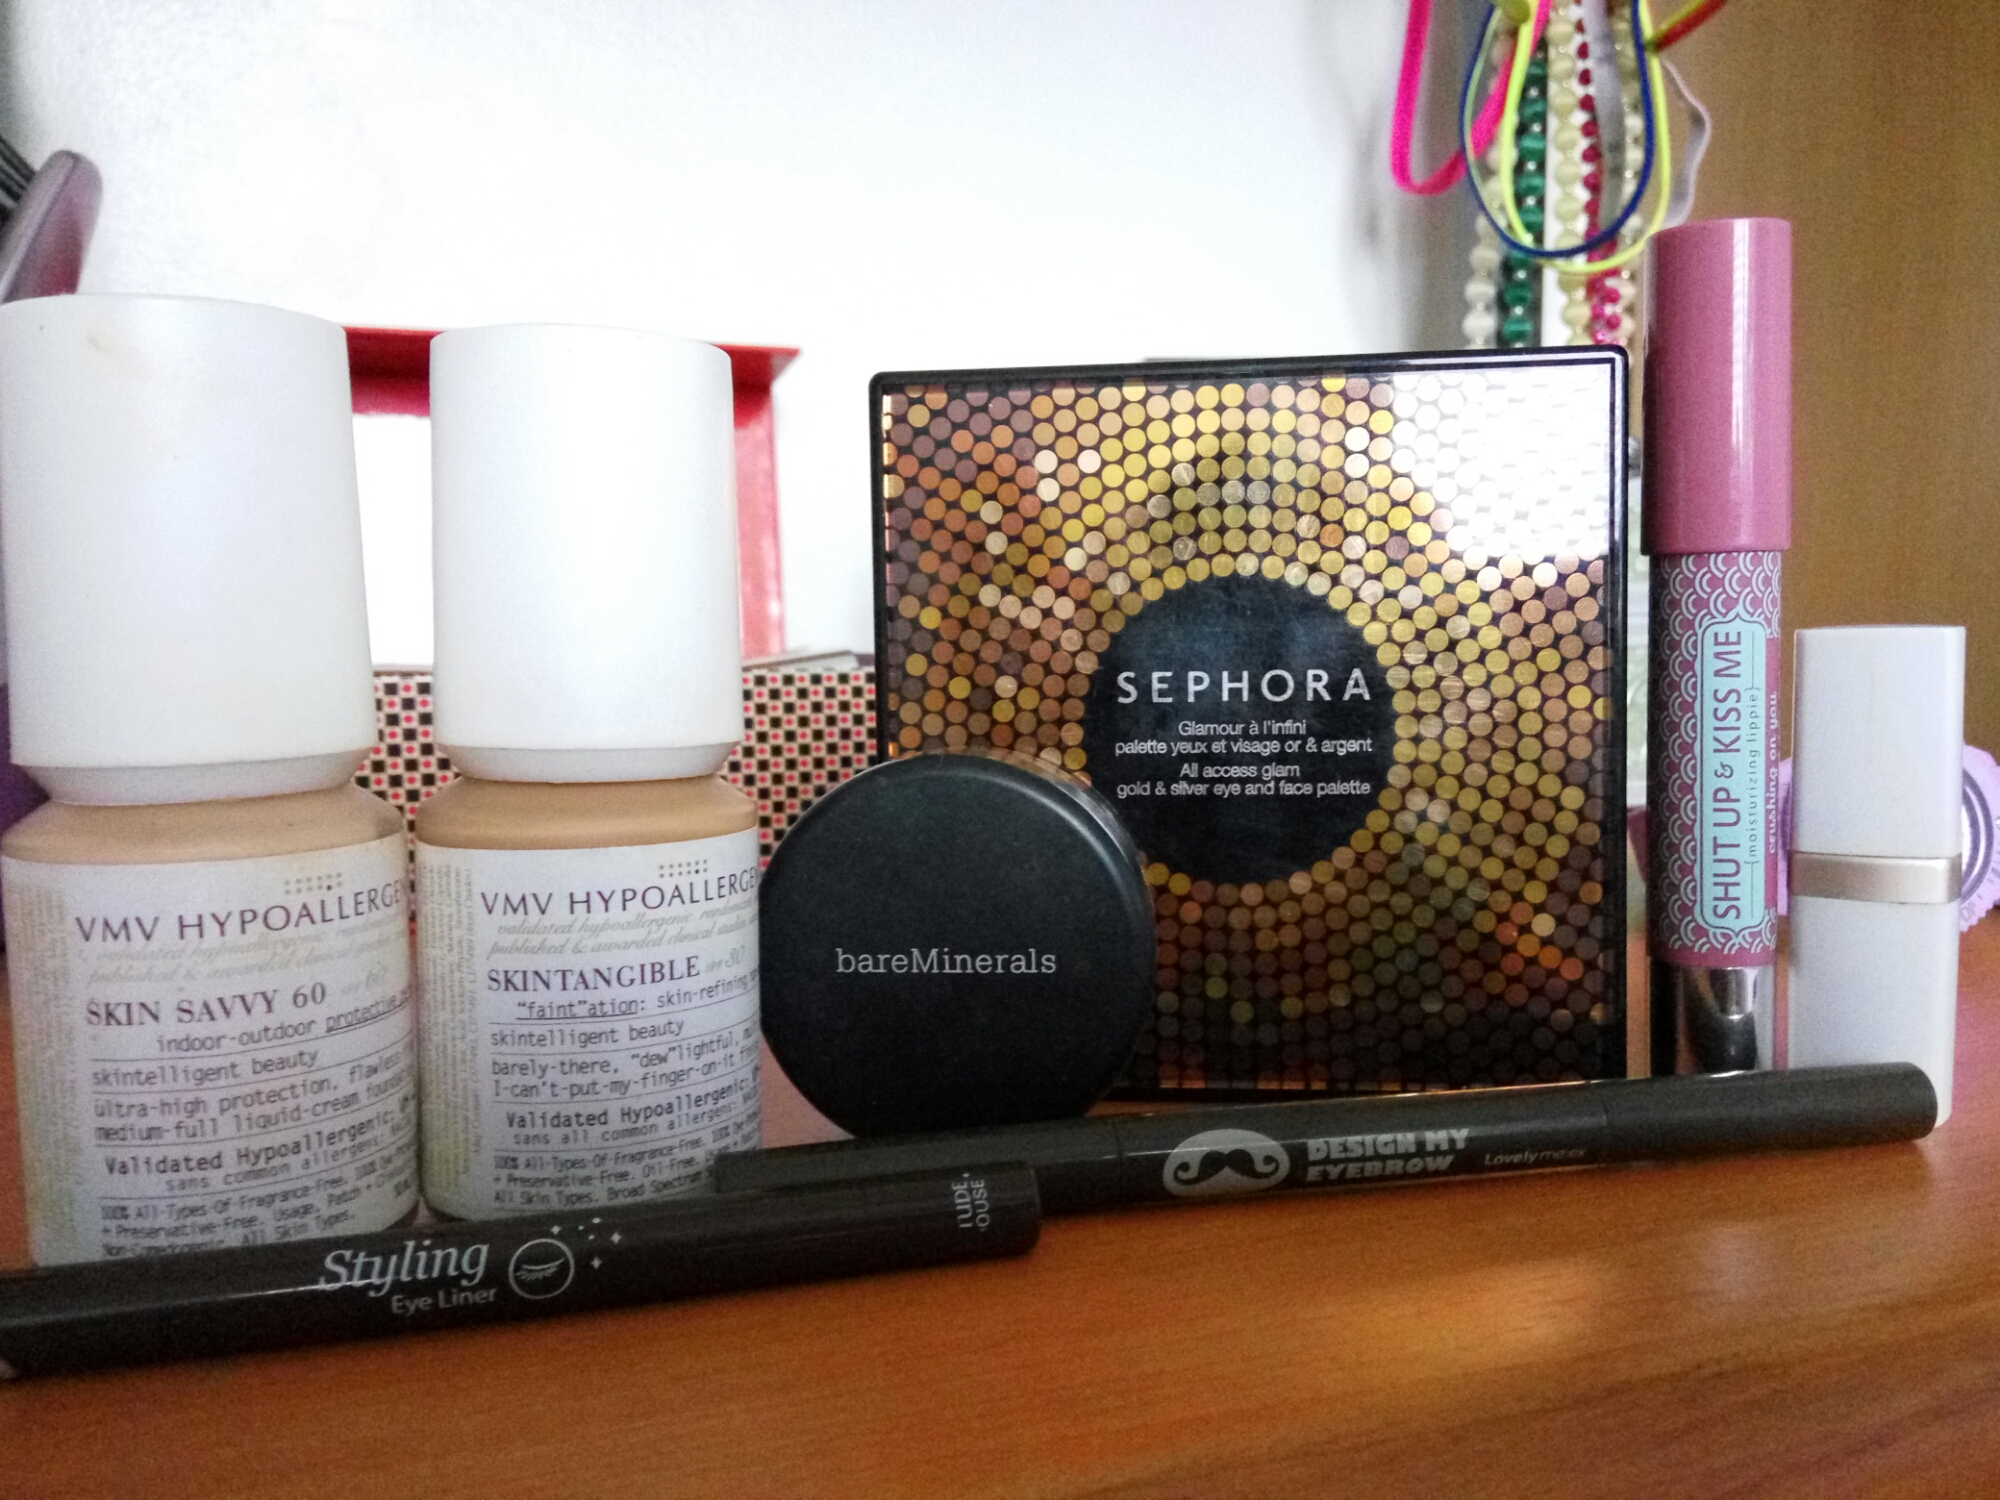
Here are the products I used. (From left to right, top to bottom.)
3) Bare Minerals Powder Foundation (available in Lazada)
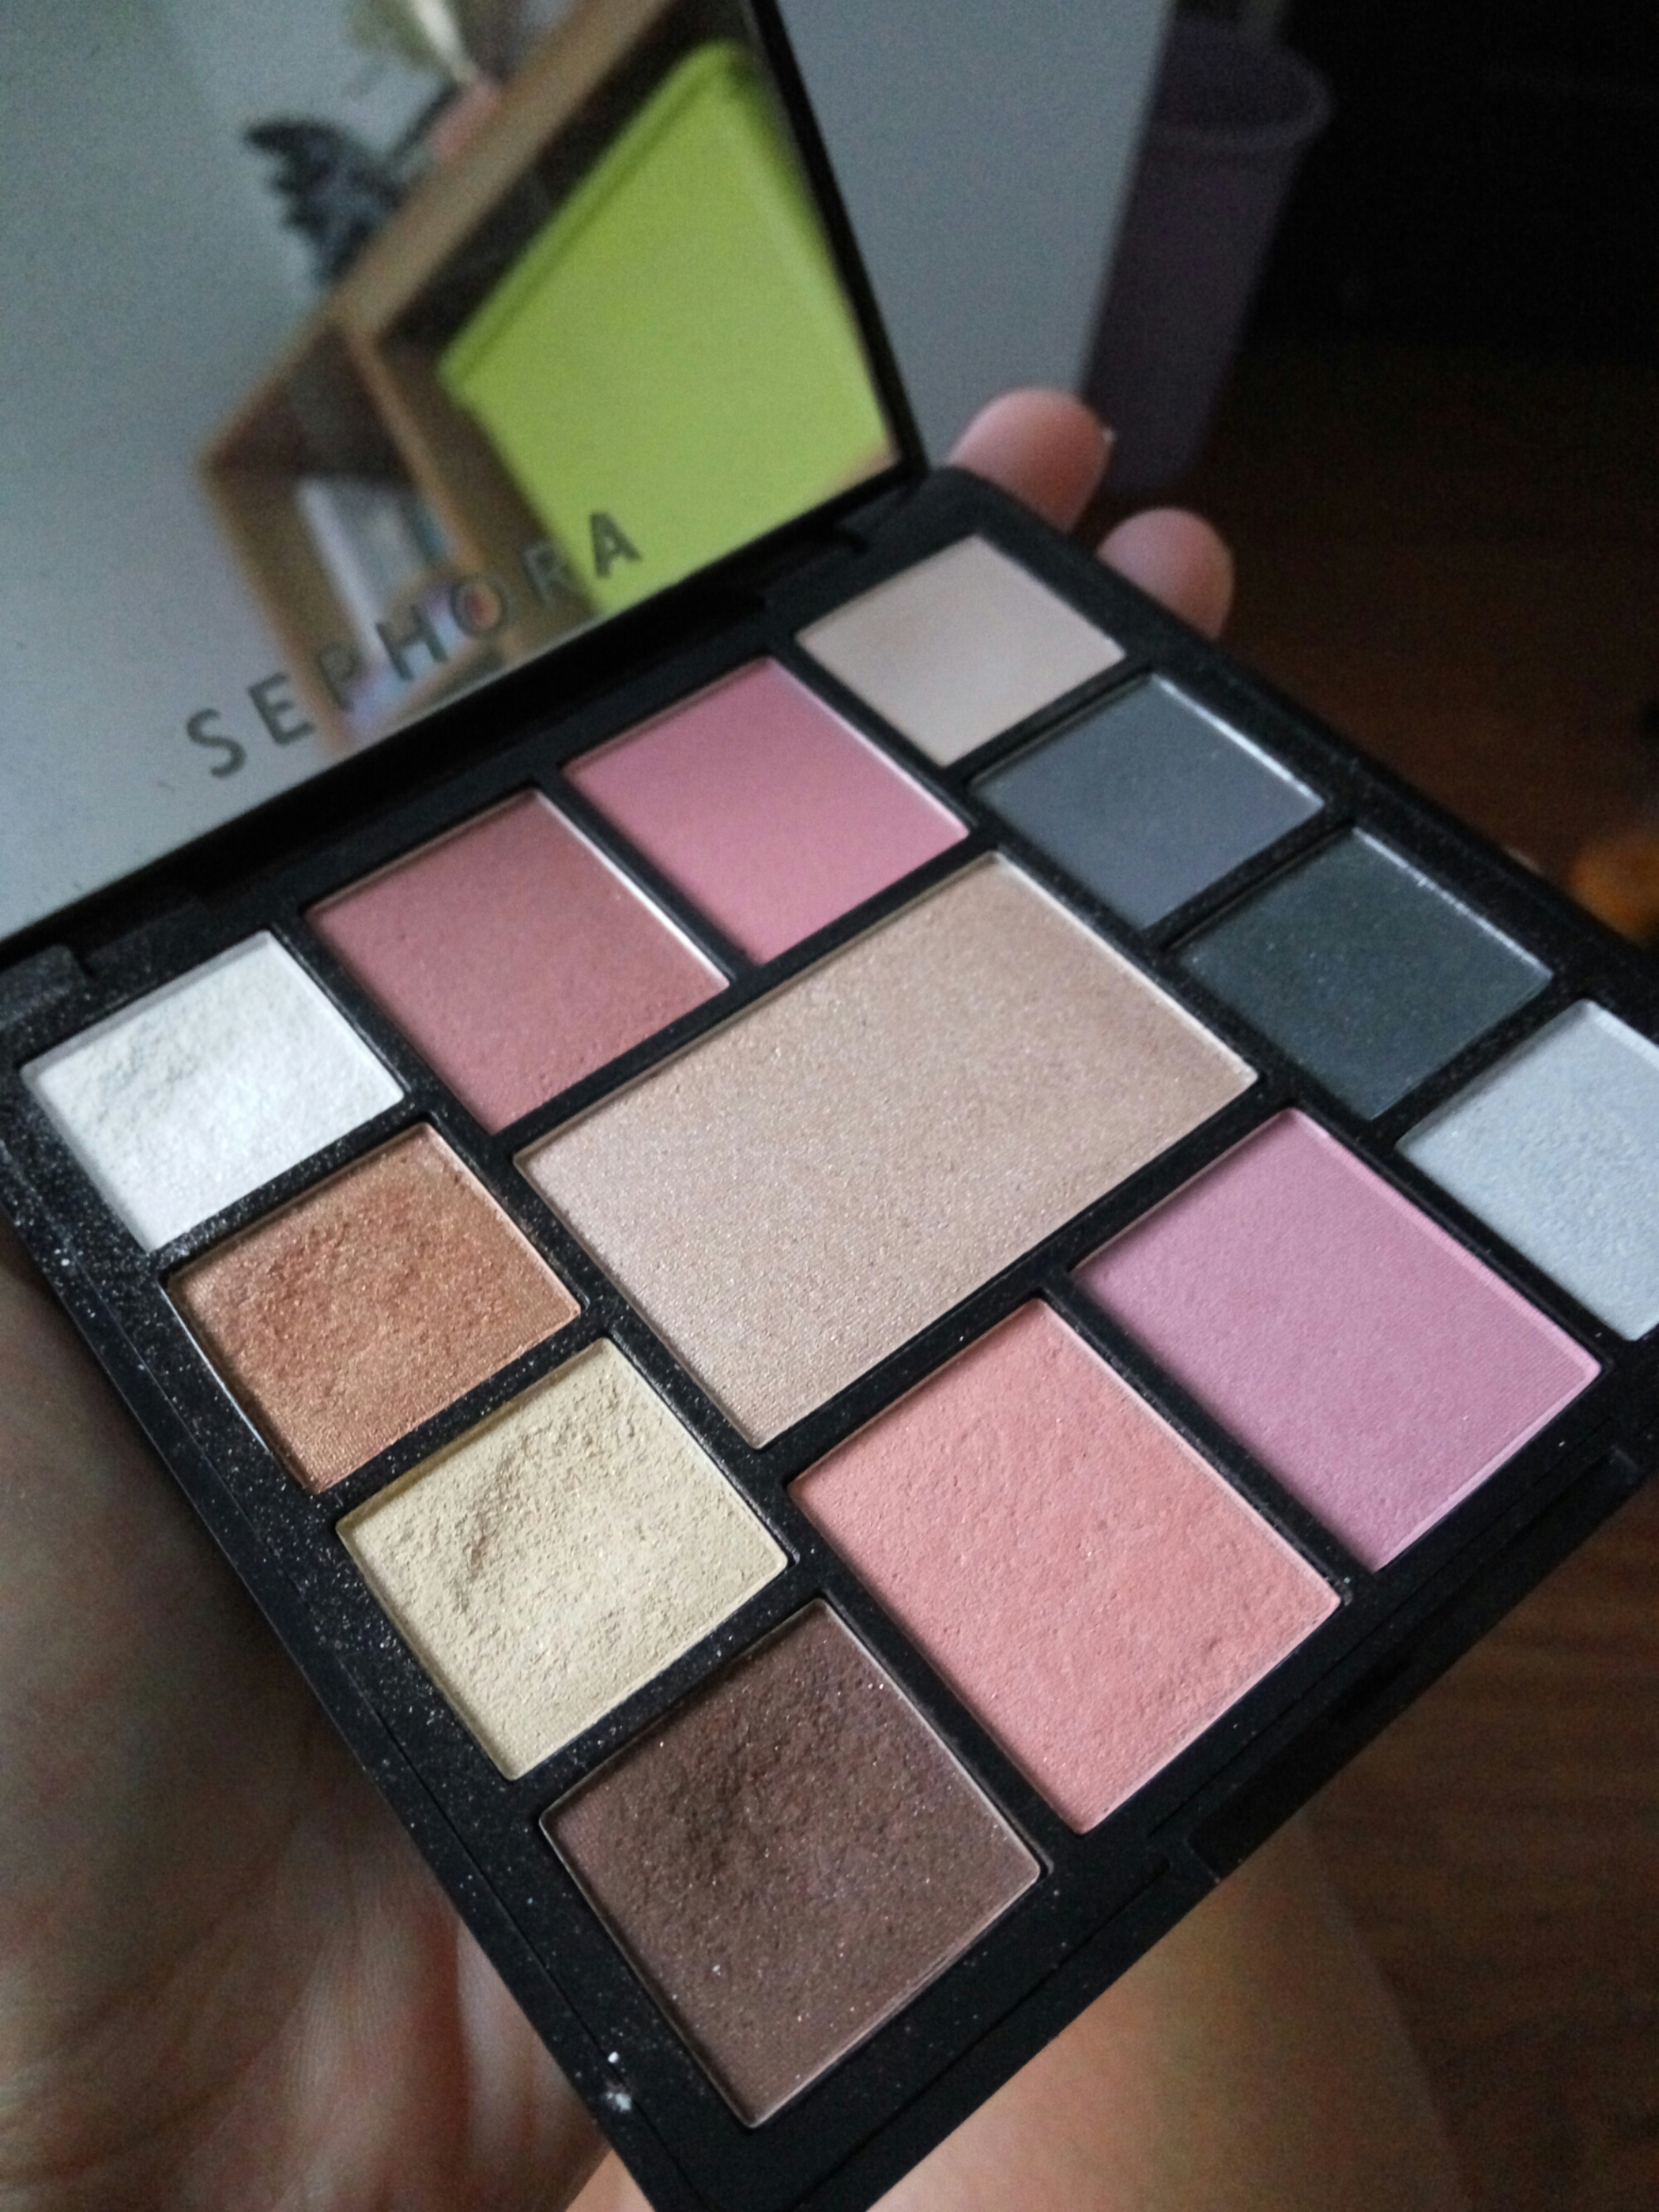
4) Sephora All Access Glam Eye and Face Palette (This was a gift.)
5) Happy Skin Shut Up and Kiss Me Lipstick, shade:Crushing on You
6) Nu Skin Lipstick, shade:Berry Glaze (For more info/to buy, here’s my sister-in-law’s number 0917.852.2249)
7) The Faceshop Styling Eyeliner (This was a gift)
9) The Faceshop Design My Eyebrow Pencil (This was a gift)
I used the VMV products as my base. I have sensitive skin, and VMV has been a reliable partner of mine for over 2 years now. Skintangible is a light, cc cream-like, skin refining product that I usually use daily. It’s best for a clean, no fuss look. Since I needed more coverage for the shoot, I used Skin Savvy to further even out my skin tone and hide dark circles and blemishes.
I used the Sephora palette for my eyes and cheeks. I used the browns for the shots where I wore white, for a clean, natural look, then I used the darker blue shades for a more dramatic look when I wore red and when we shot in Lake Pandin. I also used the same palette for my cheeks.
I defined my brows and upper and lower lids with the The Faceshop eyeliner and eyebrow pencil. Both of these are color brown. I like using the color brown because these colors end up looking more natural.
Just like my eye shadow, which entailed different colors for the different looks, I used two different lipstick shades for the two separate looks. The Happy Skin lipstick went with the white outfits because the color was a natural-looking shade of pink. The Nu Skin lipstick, a red shimmery hue, was more appropriate for the second look.
Finally, I used the Bare Minerals powder foundation to seal in everything and keep me shine free throughout the day. Every time I’d break into a sweat I’d also retouch with this light and breathable product.
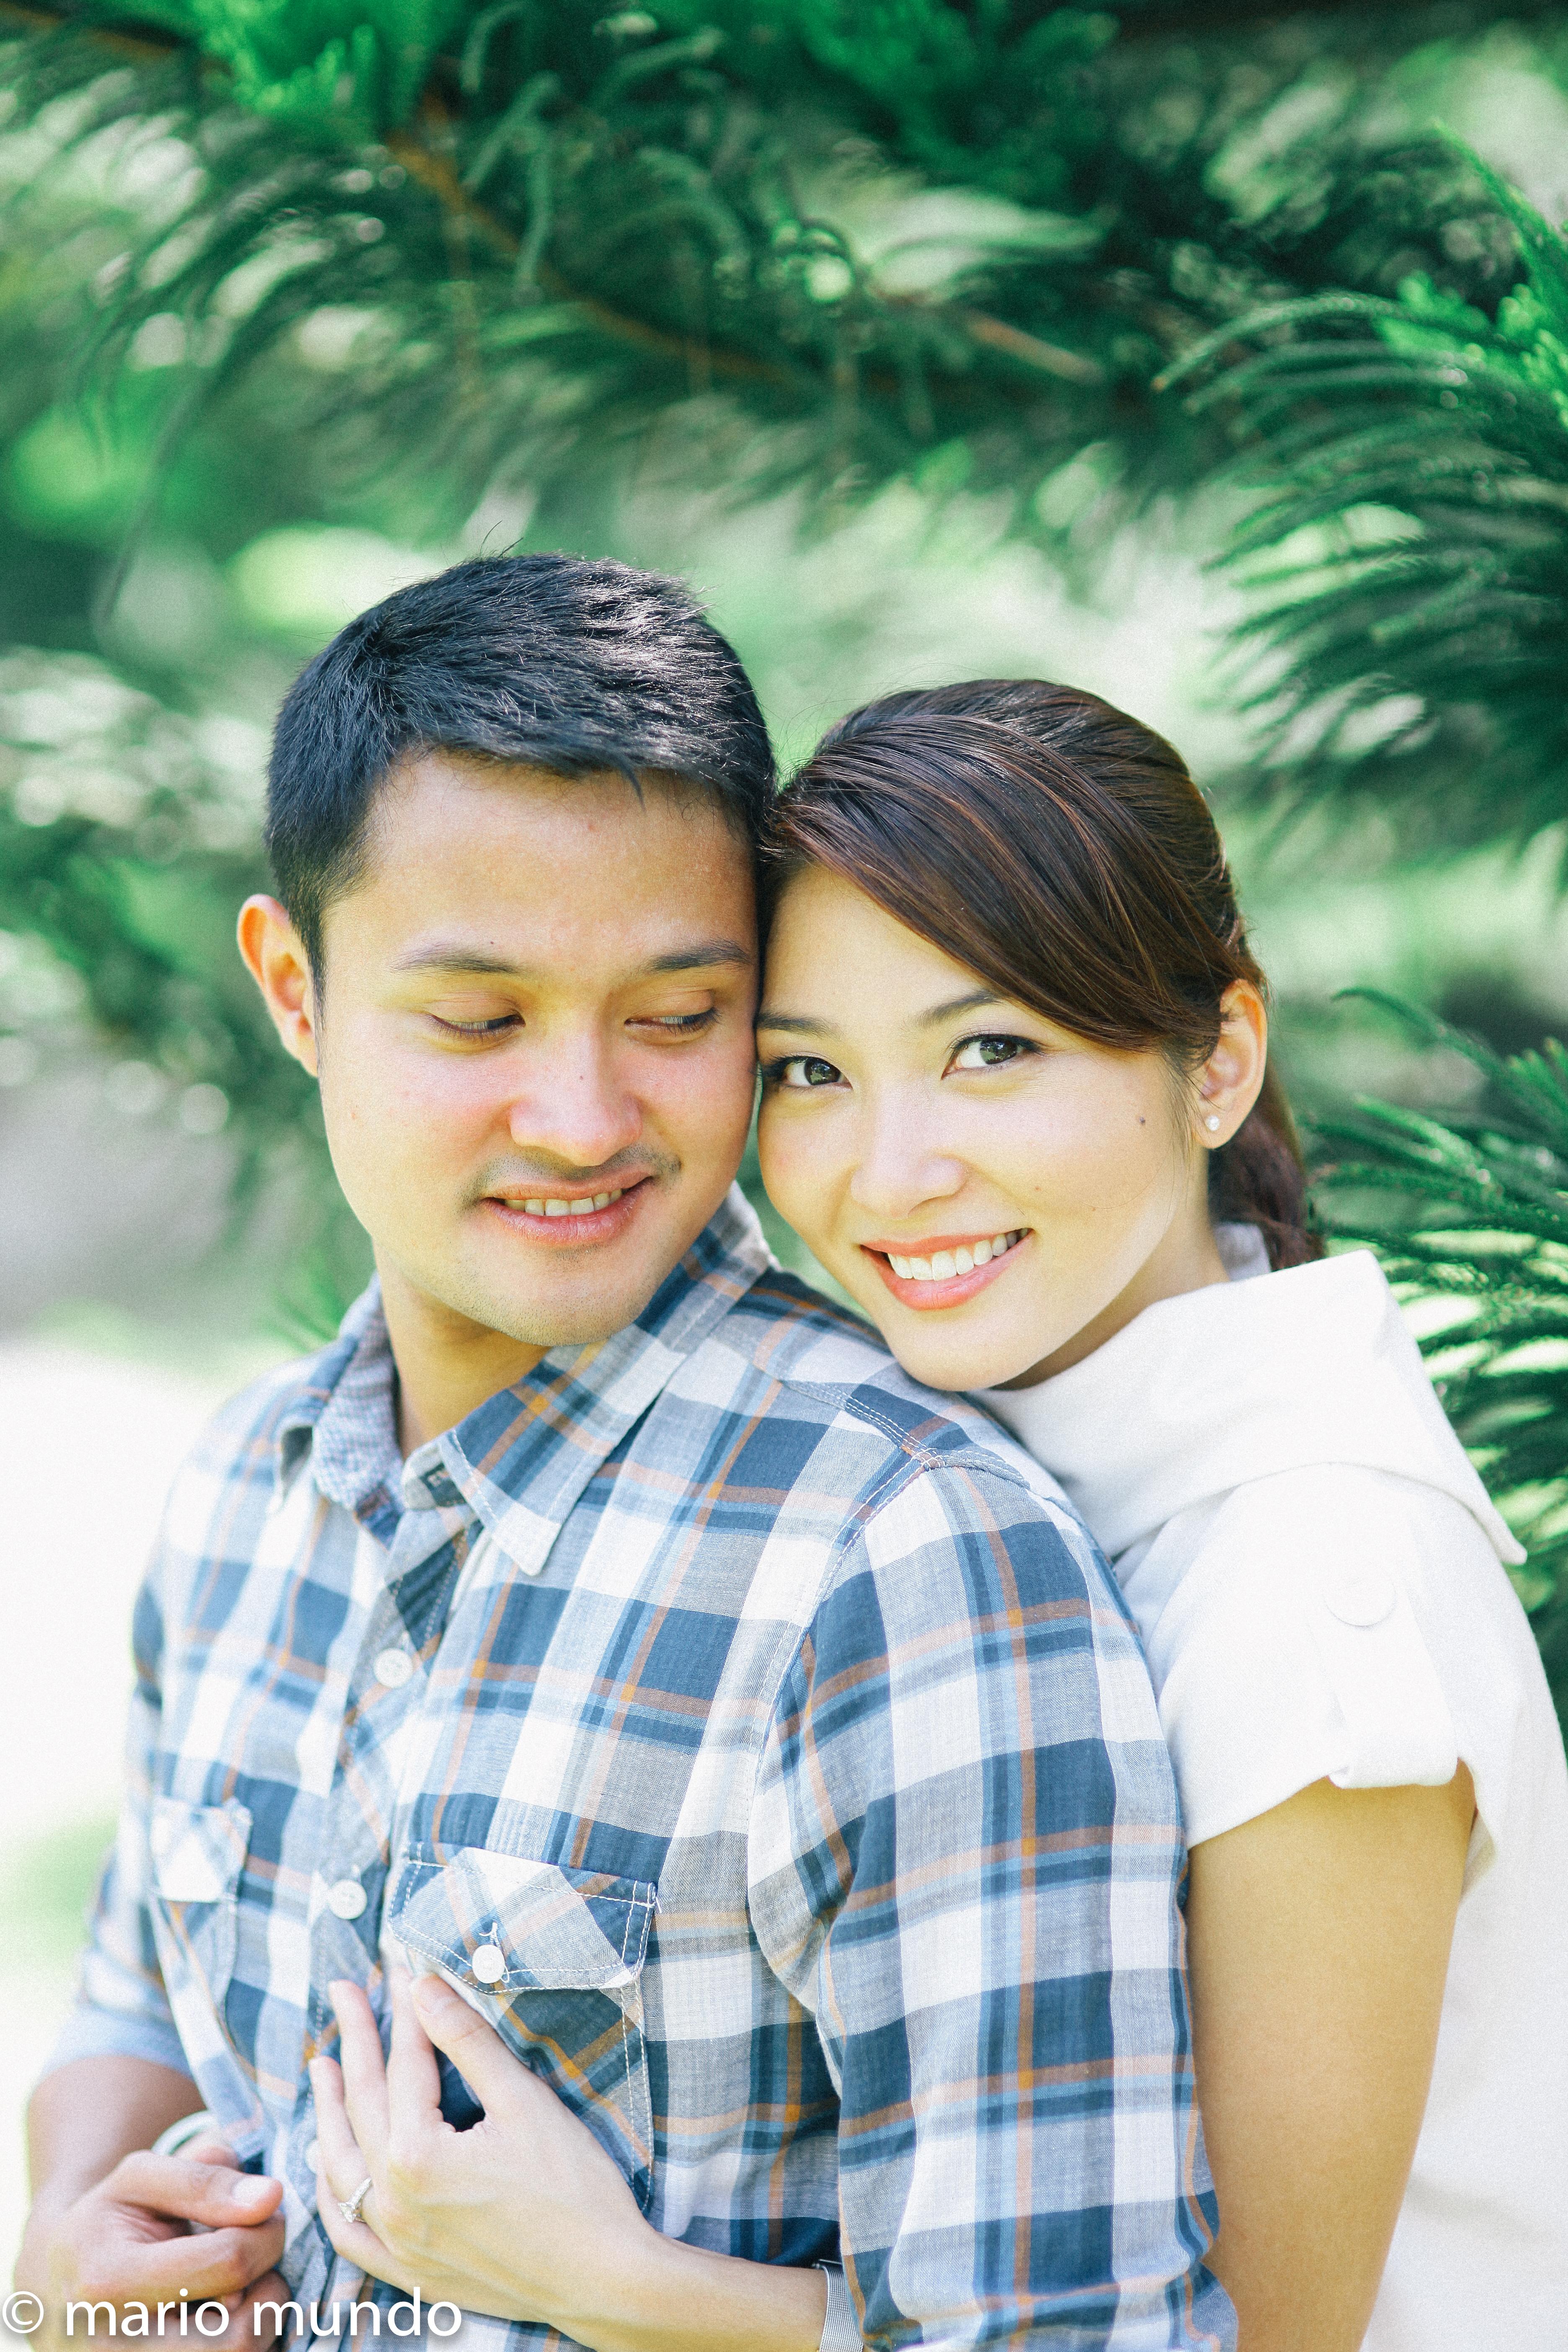
Here’s a picture of the first look.
And here’s a photo of the second. I added false eyelashes to this look.
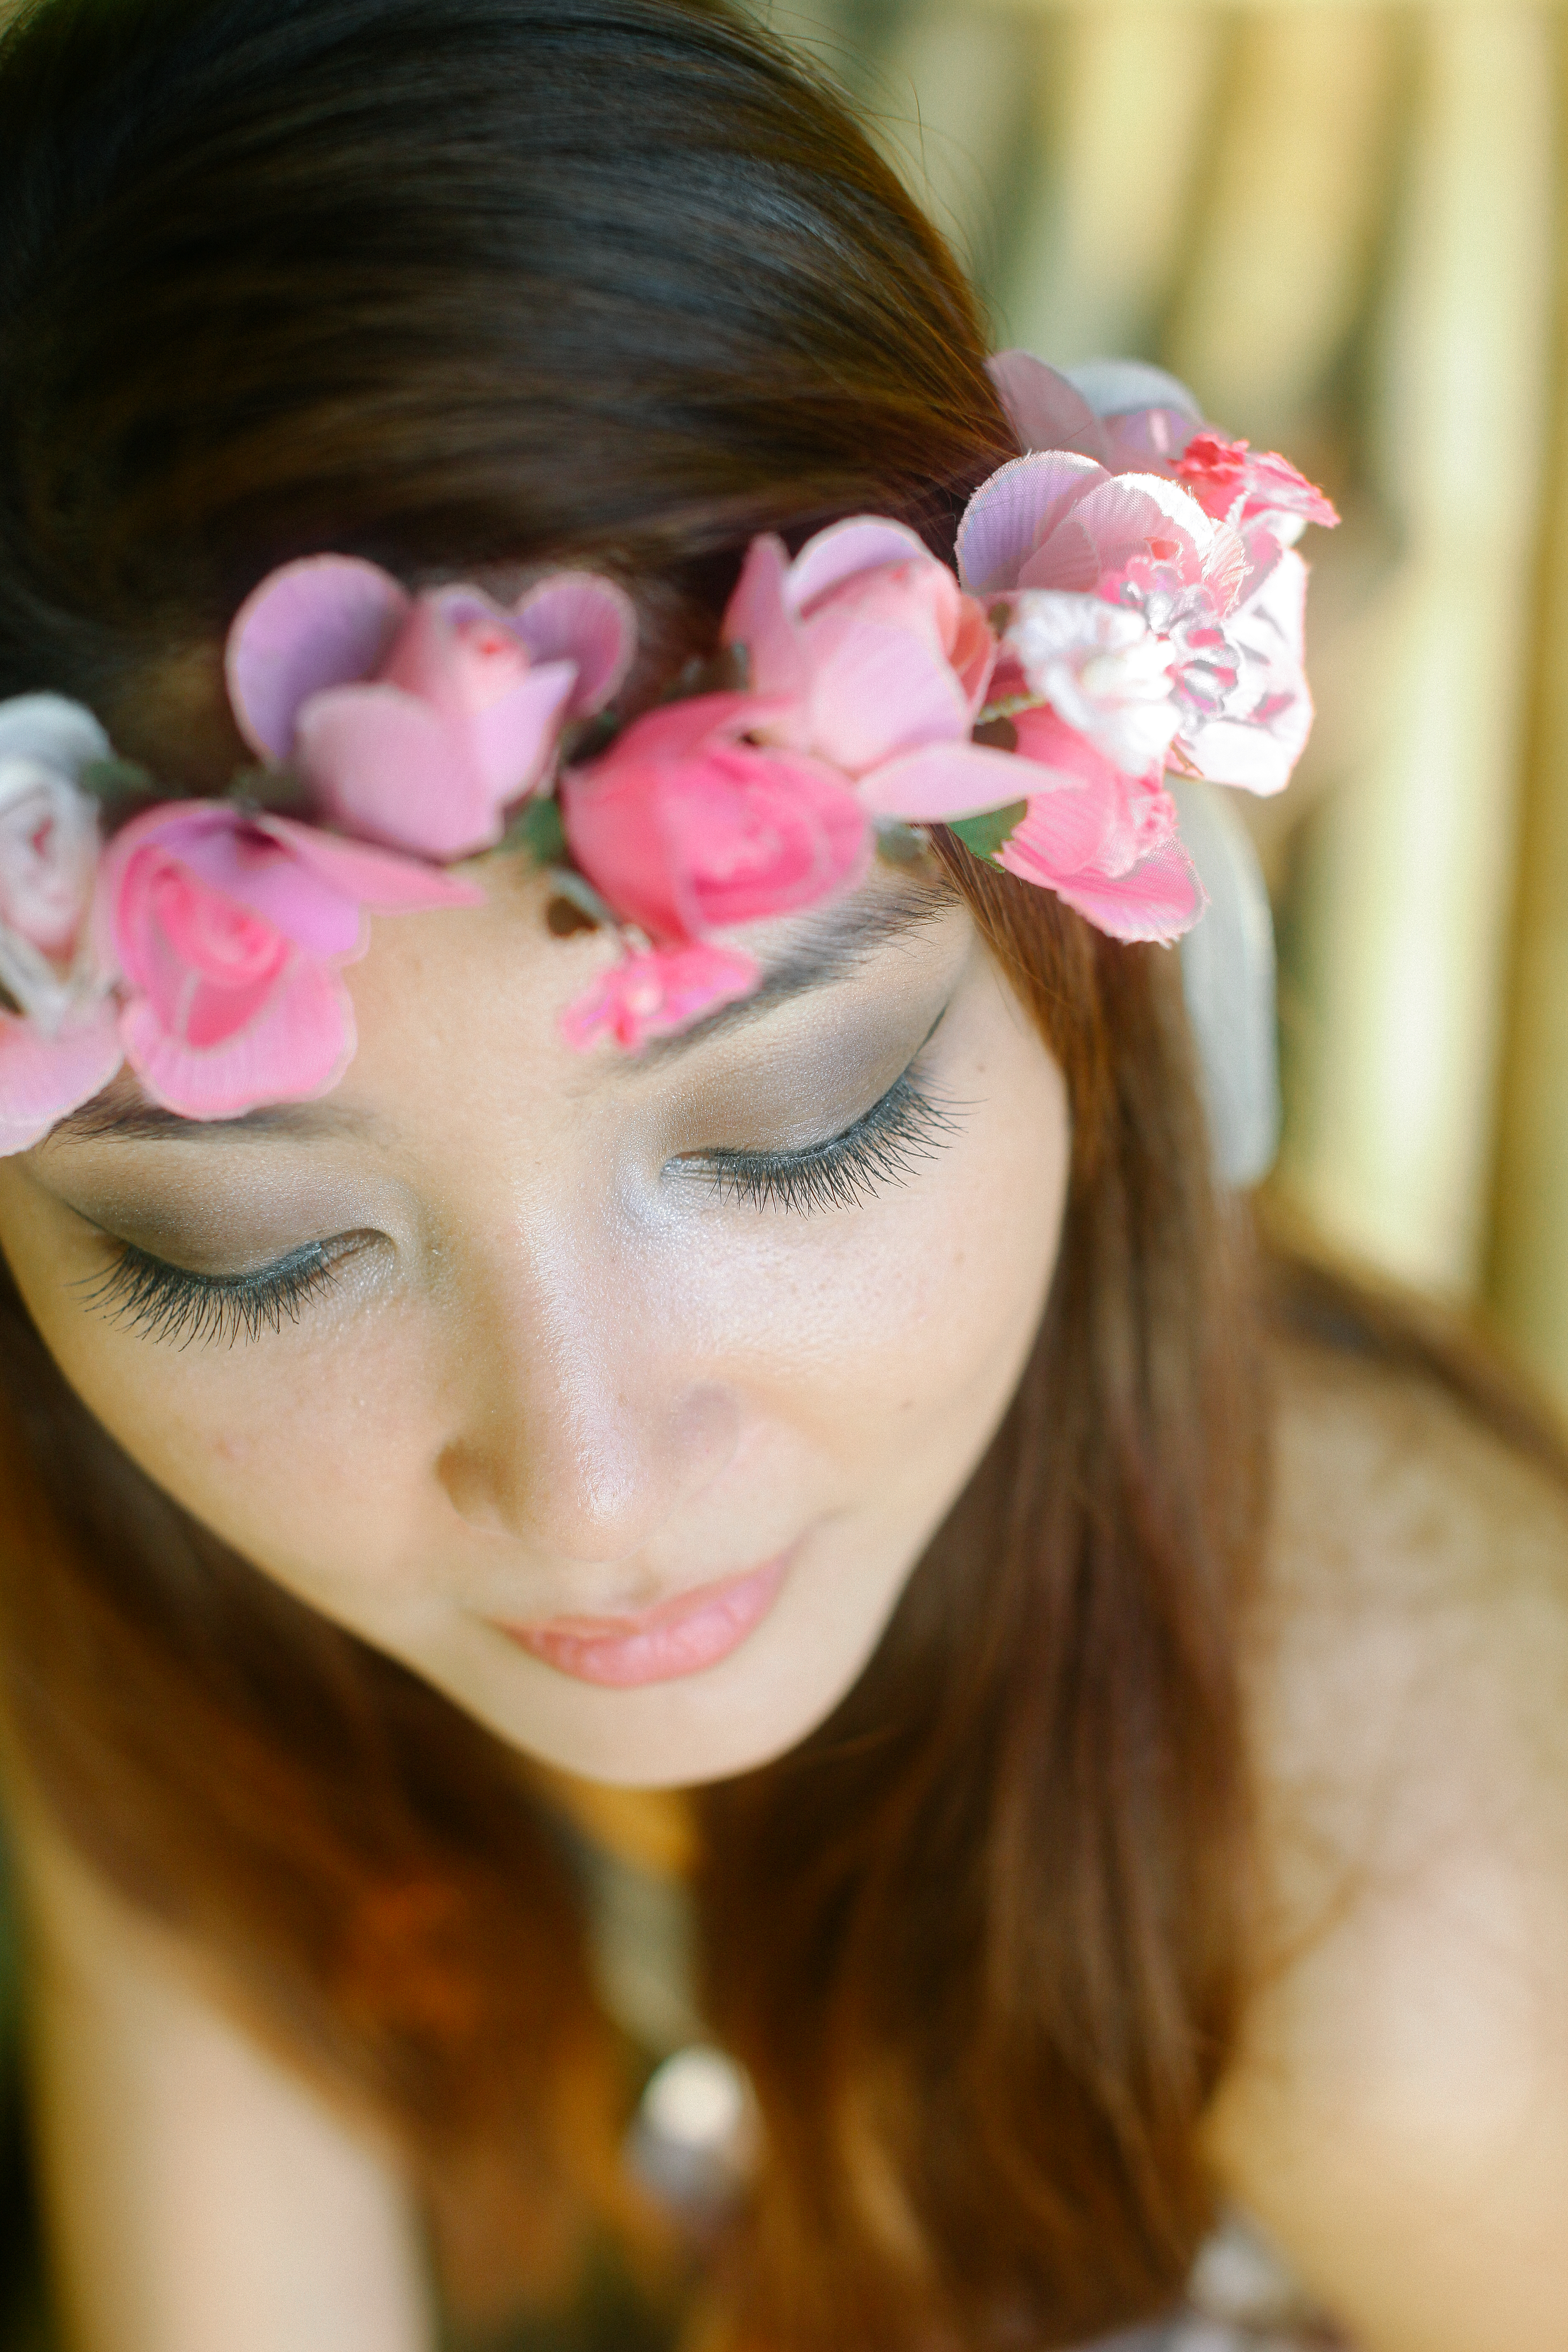
I’m no pro make-up artist and I didn’t even attempt to execute anything close to what the pros do. I just knew I wanted two contrasting looks and I did my best to achieve them with the tools and products I already had. I’ve come up with a few tips based on my experience. So here’s my two cents worth for those who want to try DIY make-up for their prenup.
1) Use products that you’re already accustomed to. You will be sure your skin won’t react and you can control application because you’re used to the products already. I was tempted to buy a whole set of new products for the shoot but I realized that it was not the time to experiment. If I had wanted to use new products, I should have bought them beforehand and done several trials a few weeks back.
2) Start light then work your way towards darker colors. This allows room for adjustment in case you make a mistake along the way. If you start out with a dramatic look and make a mess, it will be harder to fix and and revert back. It’s easier to start light and then carefully add more color little by little until you achieve your desired darker, more dramatic look.
3) About 2-3 weeks before, take extra care of your skin to avoid break outs and unwanted zits during the shoot. Without a professional make-up artist, you might not have the best tools to hide imperfections. I suggest having a facial or using masks (click here to read about my favorite masks) to further enhance your skin texture and over-all complexion.
DIY-ing your own prenup make-up can be scary but I think it’s a lot of fun. If you feel like trying it, go ahead. Just take extra care and maybe do some DIY trials also on your own beforehand.
<3, Micki
